The world of custom apparel and garment decoration is undergoing a massive transformation. For decades, screen printing, heat transfer vinyl (HTV), and direct-to-garment (DTG) printing have dominated the industry. However, a revolutionary technology has emerged that is rapidly changing the way businesses and hobbyists approach custom clothing: the DTF Printer. Find out the best info about direct to film printer.
Whether you are a seasoned print shop owner looking to expand your offerings or an ambitious entrepreneur starting your first apparel brand, understanding this technology is absolutely crucial. Direct to Film (DTF) bridges the gap between high-quality, full-color printing and incredible versatility across various fabrics.
In this comprehensive guide, we will explore every facet of the DTF ecosystem. From the chemistry of the inks to the nuances of daily maintenance, and from equipment investments to the final heat press, we are going to dive deep into what makes this method so powerful. Let us pull back the curtain on this exciting technology.
Chapter 1: What Exactly is a DTF Printer?
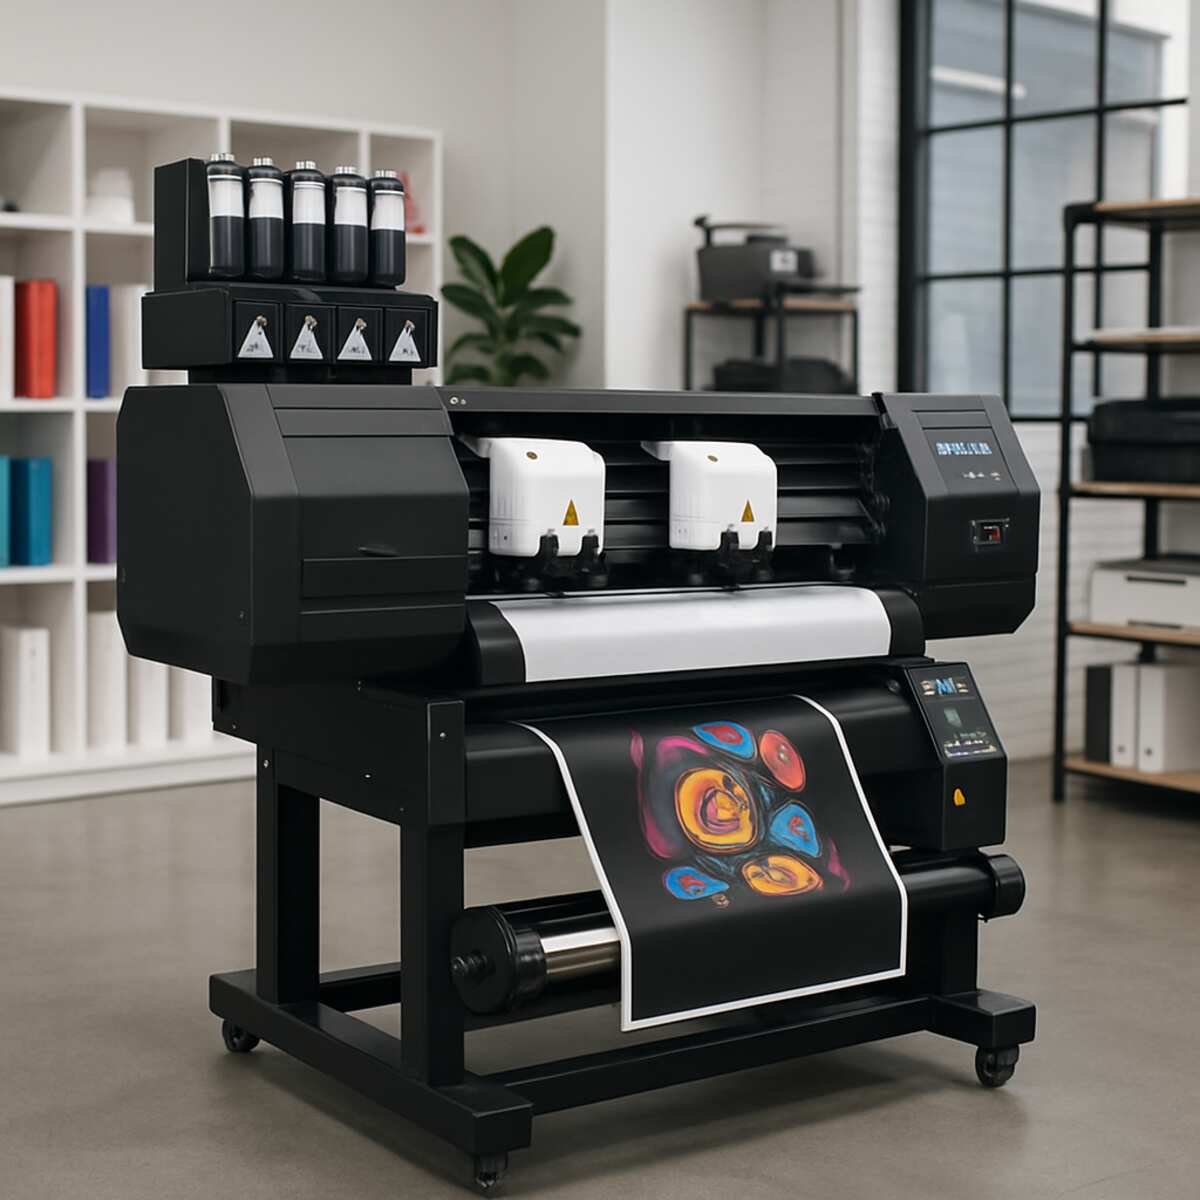
At its core, a DTF Printer is a specialized inkjet machine designed to print custom graphics onto a special clear film. However, unlike standard desktop printers that print onto paper, DTF machines use highly specialized textile inks. Once the graphic is printed onto the film, an adhesive powder is applied and melted, turning the printed image into a durable, stretchable dtf transfer that can be applied to almost any fabric using a standard heat press.
The Evolution of the Technology
Historically, if you wanted a full-color graphic on a black cotton t-shirt, you had a few choices. You could screen print it (which requires expensive setups and high minimum orders), use DTG (which requires expensive machinery and pre-treatment of the garment), or use printable vinyl (which can feel thick, stiff, and uncomfortable).
The DTF printer completely bypasses these limitations. It allows for full-color, photorealistic images to be printed quickly, with no garment pre-treatment, and applied to virtually any fabric substrate.
Enter the UV DTF Printer
While traditional DTF is meant for textiles, it is worth noting an exciting spin-off technology: the uv dtf printer. While standard DTF uses heat and adhesive to bond ink to fabric, UV DTF uses ultraviolet light to cure ink onto a film alongside a varnish and adhesive layer. This creates a hard-surface transfer that can be applied like a highly durable sticker to glass, metal, plastic, and ceramics without the need for a heat press. Though our focus here is on textiles, knowing about UV DTF shows just how adaptable film-transfer technologies have become.
Chapter 2: The Direct to Film Printing Process Demystified
To truly appreciate the technology, you need to understand the workflow. The direct to film printing process is remarkably straightforward, yet it involves a precise sequence of chemical and thermal reactions.
Here is the step-by-step breakdown of how a digital design becomes a wearable masterpiece.
Step 1: Design and Software Preparation
Every great print starts with a great design. Once your graphic is ready (typically a high-resolution PNG with a transparent background), it must be processed by specialized software.
Using high-quality RIP software for garment decoration is mandatory. “RIP” stands for Raster Image Processor. This software translates your digital image into language the printer understands. More importantly, it manages the color profiling and controls the white ink layer. Because DTF relies on a white ink base to make colors pop on dark garments, the RIP software calculates exactly where to place the white ink, often applying a slight “choke” (shrinking the white layer by a pixel or two) so that no white borders peek out around your design.
Step 2: Printing on the Film
The DTF printer lays down the ink in a very specific order. First, it prints the color layer (Cyan, Magenta, Yellow, and Black). Immediately after, a second set of print heads lays down a solid layer of white ink directly on top of the wet colors. Note: Because the image is printed onto a film that will be flipped over onto the shirt, the design is printed in reverse (mirrored).
Step 3: Hot Melt Adhesive Powder Application
While the white ink is still wet, the film is passed through a powdering station. Here, the hot melt adhesive powder application takes place. This powder is finely milled polyurethane (TPU). It sticks exclusively to the wet white ink and falls off the dry, unprinted areas of the PET film. In commercial setups, an automated shaker gently beats the film to ensure excess powder is knocked off, leaving a perfectly coated, crisp image.
Step 4: Melting and Curing
The powdered film must now be subjected to heat to melt the adhesive powder into the ink. Knowing how to cure dtf powder correctly is the secret to a soft, flexible, and durable transfer.
The film moves into a curing oven for heat transfers. Inside the oven, temperatures typically range between 110°C to 125°C (230°F to 260°F) for about 2 to 3 minutes. The powdery, sugary appearance of the adhesive melts into a smooth, slightly glossy, gel-like layer. If it is under-cured, it won’t bond to the shirt; if it is over-cured, the adhesive degrades and becomes brittle.
Step 5: The Heat Press Application
Once cured, the film is ready to be pressed. The operator places the garment on the heat press, positions the transfer film, and presses it. After the press is complete and the garment cools (or while it’s hot, depending on the film), the film backing is peeled away, leaving the ink permanently bonded to the fabric.
Chapter 3: Essential Equipment and Materials
To achieve retail-quality results, every component in your DTF pipeline must be optimized. Let’s break down the physical materials and hardware you need.
1. The Printer Hardware
Whether you are using a converted desktop printer (like an Epson EcoTank) or a commercial wide-format dual-head machine, the printer is the heart of the operation. Commercial machines utilize industrial print heads (such as the Epson I3200-A1) designed specifically for the viscosity of textile inks.
One of the most critical features to look for in a machine is a white ink circulation system. White DTF ink contains titanium dioxide, a heavy pigment that settles quickly. If left sitting, it will separate and cause catastrophic blockages in the print lines and dampers. A circulation system automatically pumps and stirs the white ink on a set schedule, saving you from constant manual maintenance and ruined print heads.
2. PET Transfer Film Types
Not all films are created equal. DTF film is made of Polyethylene Terephthalate (PET) and is coated with a special release layer that holds the wet ink but lets it go when heat is applied. Understanding PET transfer film types will dictate your workflow:
- Cold Peel Film: After heat pressing, you must wait for the garment and film to completely cool down before peeling. This provides a beautiful matte finish and excellent detail retention.
- Hot Peel Film: Can be peeled immediately after the heat press opens. This drastically speeds up production time in high-volume shops.
- Warm Peel Film: A middle ground, peeled a few seconds after pressing when it is warm to the touch.
- Specialty Films: Today, you can also find glitter, glow-in-the-dark, and reflective PET films that add special effects to your standard CMYK prints.
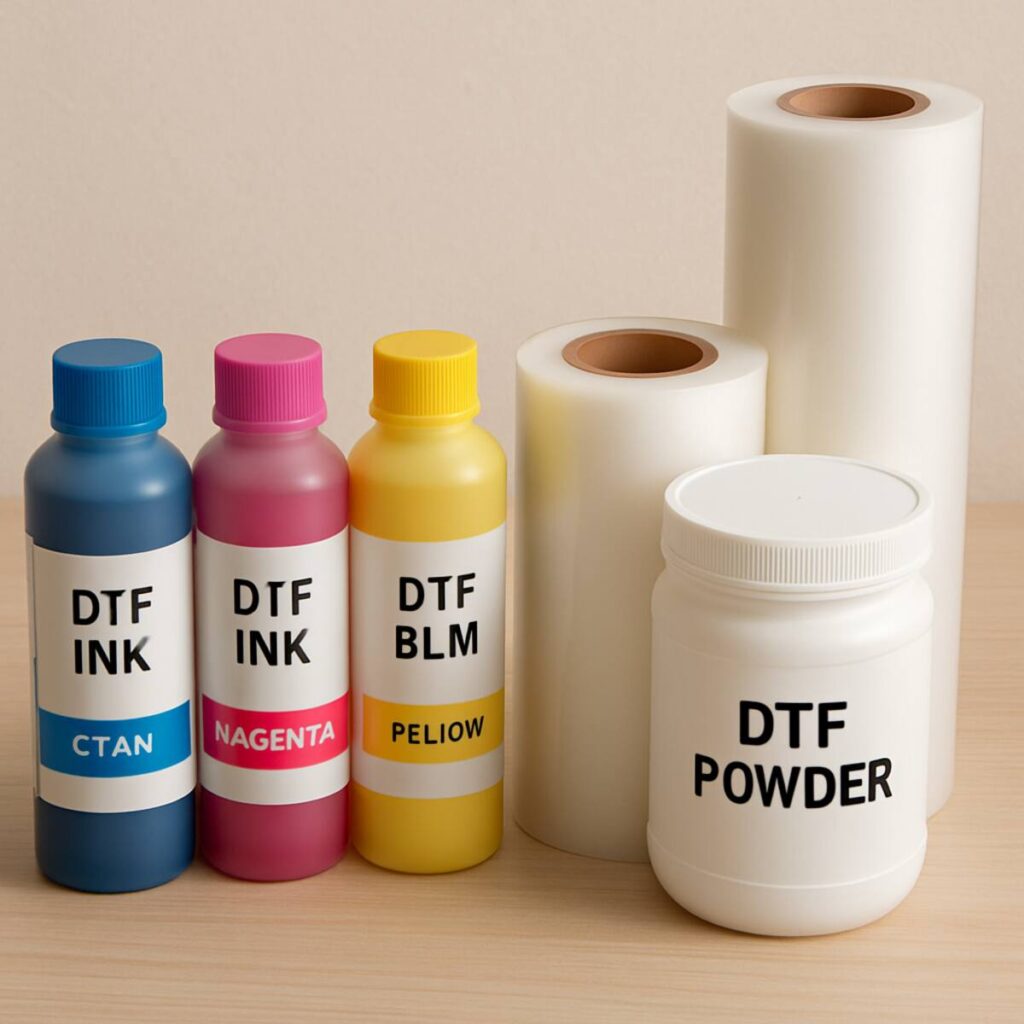
3. DTF Ink
Textile pigment ink quality cannot be overstated. Cheap inks tend to run, clog, or produce muted colors. High-quality DTF inks are formulated to be highly elastic and vibrant. They must survive the high temperatures of the curing process without shifting in color (a process known as color shift).
4. TPU Powder (Adhesive)
The hot melt powder comes in different grinds:
- Coarse Powder: Great for thick garments like hoodies and denim. It provides a highly aggressive bond but can feel a bit heavier.
- Medium Powder: The industry standard. Perfect for t-shirts and general apparel.
- Fine Powder: Used for highly detailed designs and thin, delicate fabrics where a very soft “hand” (feel) is desired. There is also black powder available specifically designed to block dye migration on dark garments.
Chapter 4: DTF vs. Other Garment Decoration Methods
To truly grasp the value of a DTF printer, we must compare it to the traditional methods it is currently replacing.
DTF vs Sublimation for Cotton
This is perhaps the most frequent comparison in the apparel community. Sublimation printing turns solid ink into a gas that dyes the fabric directly. It results in a print with zero feel (no hand) and incredible durability.
However, sublimation has a massive limitation: it only works on light-colored polyester fabrics. If you try to sublimate on 100% cotton, the ink simply washes out in the first laundry cycle because there are no plastic fibers for the gas to bond with.
When analyzing dtf vs sublimation for cotton, DTF is the clear victor. Because DTF uses an adhesive powder, it bonds mechanically to the fibers of the cotton rather than relying on a chemical reaction with polyester. This allows decorators to offer the brilliant, full-color designs associated with sublimation, but on 100% black cotton t-shirts—a feat impossible for sublimation alone.
DTF vs. Direct to Garment (DTG)
DTG acts like a giant inkjet printer for clothing. While DTG provides an incredibly soft feel and fantastic quality, it requires garments to be heavily pre-treated with a chemical solution before printing. Furthermore, DTG machines are notoriously expensive and require high-cotton-content shirts to look their best. DTF bypasses the pre-treatment phase entirely and produces more vibrant colors on a wider variety of blends, often at a fraction of the hardware cost.
DTF vs. Screen Printing
Screen printing remains the undisputed king for massive, single-color bulk orders due to its low cost-per-shirt at scale. However, screen printing requires burning a separate screen for every single color in a design. If a customer wants a 10-color photorealistic image on 20 shirts, the setup time and cost for screen printing make it entirely unprofitable. DTF shines in these low-to-medium volume, high-color situations.
Chapter 5: The Unmatched Benefits of Direct to Film
If you are considering adopting this technology, it is vital to understand the comprehensive direct to film technology benefits. Here is why print shops are making the switch.
1. Fabric Versatility
DTF transfers do not discriminate. You can press a DTF transfer onto 100% cotton, 100% polyester, triblends, nylon, rayon, spandex, leather, treated wood, and even canvas. This opens up entirely new product lines: custom backpacks, umbrellas, sports jerseys, and denim jackets are all easily customizable with DTF.
2. Conquering Dark Polyester
Anyone in the apparel game knows that printing on dark polyester fabrics is a nightmare. Sublimation doesn’t work (you can’t sublimate lighter colors onto a dark shirt), and screen printing often falls victim to “dye migration”—where the dye from the polyester shirt bleeds through the ink when heated, turning white ink pink on a red shirt.
DTF solves this. By using low-temperature application and specialized black adhesive powders that act as a dye-blocker, DTF allows for crisp, opaque white and bright colors on dark, 100% polyester sports garments.
3. Incredible Durability
A common misconception about transfers is that they will crack and peel like cheap craft store iron-ons. This is entirely false for DTF. The wash durability of film transfers is exceptional. Because the TPU adhesive melts directly into the weave of the fabric and the inks are highly elastic, a properly applied DTF transfer will stretch with the garment and often outlast the life of the shirt itself. They are routinely rated for 50 to 100+ heavy wash cycles without fading or cracking.
4. Print Now, Press Later
Unlike DTG or screen printing, where the garment must be processed immediately, DTF allows you to build an inventory of transfers. You can print hundreds of designs, cure them, and store them in a folder. When a customer orders a specific size and color shirt, you simply pull the transfer and press it in 15 seconds. This eliminates the need to hold massive inventories of pre-printed apparel.
Chapter 6: Step-by-Step Pressing and Application
You can have the best printer in the world, but if your heat press technique is flawed, the final product will fail. Let us discuss the proper heat press settings for dtf transfers.
While settings can vary slightly depending on your specific film and powder manufacturer, here is the industry-standard workflow for applying a DTF transfer to a standard cotton/poly t-shirt:
The Application Process
- Pre-Press: Heat your press to 150°C to 160°C (300°F to 320°F). Place the blank garment on the lower platen and press it for 3 to 5 seconds. This flattens the fibers and, more importantly, evaporates any invisible moisture trapped in the fabric. Moisture is the enemy of adhesion.
- Positioning: Place your DTF transfer onto the garment, ink side down. You can use heat-resistant tape to secure it if you are pressing on an awkward item like a sleeve or hat.
- The First Press: Close the press with medium-heavy pressure (usually around 40-60 psi). Press for 10 to 15 seconds.
- The Peel: Open the press. If you are using cold peel film, remove the shirt from the press, lay it flat, and wait until it is completely cool to the touch. Once cool, grab a corner and peel the film away in one smooth, low-angle motion. If using hot peel, peel immediately upon opening the press.
- The Second Press (Crucial Step): Never skip this! Place a sheet of Teflon, parchment paper, or a matte finishing sheet over the exposed design. Press again for 5 to 10 seconds. This secondary press drives the melted adhesive deeper into the fabric fibers, significantly improving washability and removing the “plastic” shine, leaving a beautiful, soft, retail-ready finish.
Chapter 7: Maintenance and Troubleshooting
Let us address the elephant in the room. Owning a DTF Printer is not like owning a laser printer for your home office. It is industrial machinery handling fast-drying liquid plastics. Therefore, preventing print head clogging in textile machines is the single most important skill a DTF operator can learn.
The Anatomy of a Clog
DTF inks—especially white—dry quickly. When ink dries inside the microscopic nozzles of a print head, it creates a blockage. This results in “banding” (horizontal lines missing from your print) or completely missing colors.
Daily Maintenance Routine
To keep your machine running flawlessly, you must implement a strict maintenance schedule.
- Agitate the Ink: Even with a white ink circulation system, it is good practice to gently shake the ink tanks at the start of the day.
- Nozzle Checks: Before printing your first job, always run a nozzle check. This prints a tiny grid pattern. If lines are missing, you run an automated head cleaning via the software.
- Clean the Capping Station: The capping station is a rubber suction cup that seals the print head when not in use. If ink builds up on the rubber lip, air will get in, and the head will dry out. Wipe this daily with specialized cleaning solution and foam swabs (never cotton swabs, which leave lint).
- Wiper Blade Cleaning: The printer has a tiny rubber squeegee that wipes the bottom of the print head. Keep this spotless.
Environmental Control
DTF printers are highly sensitive to their environment.
- Humidity: Textile inks require moisture in the air. Keep your print room between 45% and 65% humidity. If the air is too dry, the ink will dry in the nozzles before it hits the film. A dedicated room humidifier is a cheap and vital investment.
- Temperature: Maintain a room temperature between 20°C and 25°C (68°F to 77°F). Extreme heat alters the viscosity of the ink, causing it to drip or misfire.
Chapter 8: The Business of DTF – Costs and ROI
Are you thinking about turning this technology into a business? Understanding the garment printing business startup costs and potential Return on Investment (ROI) will help you make an informed decision.
Initial Startup Costs
The barrier to entry for DTF has lowered significantly, but it still requires a realistic budget.
- The Printer:
- Entry-level (converted desktop printers): $1,000 – $3,000. These are slow and require high maintenance but are good for hobbyists.
- Mid-Range (Single or Dual Head 13-inch rolls): $3,000 – $6,000. The sweet spot for small businesses.
- Commercial (Dual/Quad Head 24-inch rolls): $10,000 – $25,000. For high-volume print shops.
- Curing Equipment: A standalone curing oven for heat transfers costs between $150 and $400. Automated powder shaker/dryer combos cost $1,500 to $5,000.
- Ventilation: Melting polyurethane powder creates fumes. You must invest in a fume extractor or proper exhaust ventilation. Cost: $300 – $1,000.
- Heat Press: A high-quality, commercial heat press (avoid cheap clamshells that provide uneven heat) will cost between $300 and $1,500.
- Consumables: A starter kit of high-grade ink, powder, and film rolls will run about $300 to $500.
Total Realistic Startup Cost: Between $4,000 and $8,000 for a reliable, small-business-ready setup.
Calculating ROI (Return on Investment)
The profit margins on DTF printing are incredibly attractive. Let’s do a basic breakdown for a standard left-chest and full-back t-shirt design.
- Cost of Goods Sold (COGS):
- Ink, Film, and Powder for an 11″x14″ design: ~$0.75
- High-quality blank cotton t-shirt: ~$3.50
- Total Material Cost: ~$4.25
- Retail Selling Price: A custom, full-color graphic tee easily sells for $20.00 to $30.00.
- Gross Profit per Shirt: $15.75 to $25.75.
If a mid-range DTF printer can produce 30 large transfers an hour, your capacity for revenue generation is exceptionally high. Furthermore, you can sell the transfers themselves directly to other crafters and businesses who own a heat press but not a printer (known in the industry as selling “DTF Gang Sheets”). This requires zero garment inventory on your part and boasts incredibly high margins.
Chapter 9: Advanced Tips for DTF Success
To elevate your DTF game from amateur to professional, implement these advanced strategies.
1. Mastering the “Gang Sheet”
In RIP software, a gang sheet is a large canvas (for example, 22 inches wide by 60 inches long) where you nest as many designs as possible tightly together. By gang-printing, you minimize film waste and maximize print speed. Learning to optimize your layouts is a critical money-saving skill.
2. Utilizing Half-Tones
A full-color, massive square photograph printed in DTF can sometimes feel like a heavy patch on a shirt (often referred to as a “sweat patch” because it doesn’t breathe). Advanced designers use Photoshop to apply halftone effects or distress filters to large designs. This creates thousands of microscopic holes in the design. When printed, no ink or powder goes into those holes, resulting in a much softer, more breathable shirt.
3. Proper Garment Sourcing
Not all blank shirts take heat equally well. Cheap polyester can suffer from a shiny press box (where the outline of the heat press permanently flattens and shines the fabric). Invest in high-quality blanks like ring-spun cotton or high-grade poly-blends. Test your heat press settings for dtf transfers on a scrap shirt before committing to a 100-piece order.
4. Color Management Profiling
Because you are printing a white base beneath colors, screen colors (RGB) do not always perfectly match printed colors (CMYK). Spend time calibrating your RIP software for garment decoration with an ICC color profile specifically designed for your exact brand of ink and film. This ensures that the bright fire-engine red you see on your monitor doesn’t print out as a dull maroon.
Chapter 10: The Future of Apparel Decoration
As we look toward the future, the technology behind the DTF Printer is only getting faster, more efficient, and more environmentally friendly. Manufacturers are already developing water-based adhesives, faster-curing powders, and print heads that are practically immune to clogging.
The introduction of the uv dtf printer for hard goods proves that the film-transfer method is expanding beyond apparel. Soon, print shops will be able to offer a one-stop solution: custom t-shirts, embroidered-look hats, and branded hard goods like tumblers and laptops, all originating from film-based digital printing.
Conclusion: Taking the Leap into DTF
The apparel decoration industry is unforgiving to those who refuse to adapt. Direct to Film has proven itself not to be a passing fad, but a foundational shift in how custom apparel is made.
Let’s recap what we’ve learned:
- The DTF Printer offers unprecedented versatility, allowing for high-definition, full-color prints without the limitations of fabric type or color.
- By understanding the direct to film printing process, from laying down the hot melt adhesive powder application to mastering how to cure dtf powder, you can produce retail-quality garments.
- When evaluating dtf vs sublimation for cotton, DTF wins easily, and it safely dominates when printing on dark polyester fabrics.
- Success relies heavily on maintenance. Utilizing a white ink circulation system and actively preventing print head clogging in textile machines will protect your investment.
- Investing in high textile pigment ink quality, understanding various PET transfer film types, and using professional RIP software for garment decoration are non-negotiable for top-tier results.
- While garment printing business startup costs require capital, the incredible wash durability of film transfers and vast direct to film technology benefits ensure a fast track to profitability.
If you are willing to learn the hardware, master your environment, and dial in your heat press, a DTF printer will unlock creative and financial potential that previous generation technologies simply could not offer. Equip your shop, maintain your machine diligently, and get ready to press your way into the future of custom apparel.